Pipeliner is a plumbing technique under cured-in-place-pipelining (CIPP). It involves repairing broken pipes without removing them from their current position. All you’ll do is insert the liner into the pipe, which will cover up the damaged areas. Once dried up, the liner will act as the pipe and is what will transport your water, gas, or oil. For this procedure to be effective, you need to install it properly.
How will you ensure the process becomes successful? This article will give you tips. Read on!
- Use The Right Tools
Successful pipeliner installation isn’t all about the process; it also involves the customers’ needs and satisfaction. If you don’t follow the client’s wishes, you might be happy with the work, but the customer won’t. Also, with CIPP lining, what works for pipe A doesn’t mean it’ll work for pipe B. Various factors influence this difference.
One is the location of the pipe you’re to repair. The majority of the pipelining equipment is large, and you can barely use it indoors. However, there’s a small electric portable heating unit from MaxLiner USA or any other company you can acquire. You can utilize this indoors or in crawled spaces, such as basements. Therefore, for a successful installation, you must have the right tools for the job. Your chosen professional should survey the area a day or two before starting the job. With this, they’ll come in and be out in a few hours, instead of a lot of back and forth as they find the appropriate tools.
The other factor determining the tools you’ll need for successful pipelining is the climate within which the project is located. CIPP involves a series of activities, one of them being curing.
Curing aims at hardening the lining to set it in place. This process takes time, but the length depends on the type and climate. If the project is in a cold region, consider hot water or steam curing techniques. These techniques will speed up the process, allowing the client to go back to using the pipe as soon as possible. This increases their satisfaction levels.
- Hire A Qualified Contractor
The basic way of ensuring your CIPP is installed properly is by working with a professional. Not just any contractor, including a plumber, can do the job satisfactorily. Some training is needed, specifically in the lining, after which the certifying body issues the trainees with certificates.
With a professional CIPP contractor, you’re more or less assured that they know what they’re doing and will get the installation right. Also, from the training, they’d be able to learn the right procedures to take, and will, therefore ,not skip any important step in the installation process.
- Inspect Your Pipes
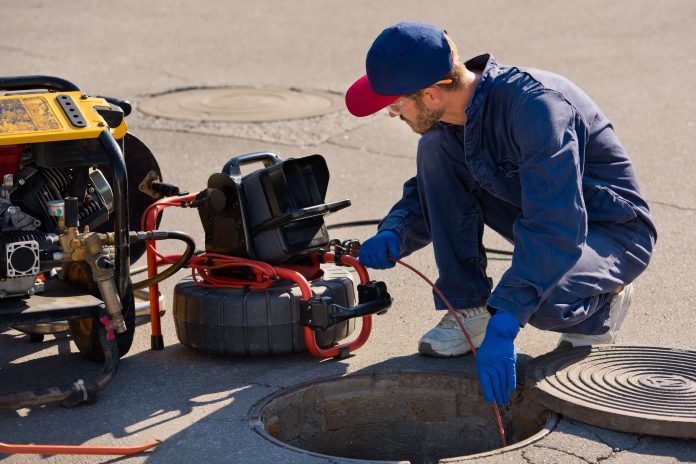
Inspecting your pipes before installation is essential since it’ll help you identify the areas needing repair. You shouldn’t worry about how you’ll see the end of the pipe, even if it’s a sewer. There are inspection tools you can pass through the pipe till the end to see the damage and extent.
Performing an inspection will also help you know the pipe’s needs, which would determine the type of liner it needs. This is regarding the length and thickness. There’s no need to line your whole pipe, whereas it’s only a small section with an issue. An inspection also eliminates situations where you miss out on an area needing repair, only to realize it a few weeks after the previous installation. This would mean calling back the professionals, which would be a waste of resources, including financial ones, since you’d have to acquire extra resources.
- Adopt The Right Liner
The right liner, in this context, refers to the thickness and size of the lining. The size of the pipe liner will determine how well it’ll fit in the pipe requiring repair. It’ll also determine its efficiency.
A liner that’s too big for the pipe will fold itself when in the pipe and will affect the flow of water in the future. It might lead to clogging in some situations due to slow-moving water.
Also, the pipeliner shouldn’t be too thin. It won’t be strong enough to withstand external pressures, such as high-water pressure or strong winds, if it’s too thin. It’ll succumb to the pressure, burst, and lead to the re-occurrence of the previous drainage issues. Therefore, ensure the liner is thick enough and slightly smaller in diameter than the old pipe for perfect cohesion between the two.
- Clean Your Pipes
With the continual use of your pipes over the years, dirt and grime will have built up on their inner surfaces. Such substances can affect the installation of your pipelining. For instance, grime will prevent the proper bonding of the liner to the surface of the old pipe. Also, cleaning the pipes will expose the areas needing repair. Therefore, make sure to clean the pipes before installation.
For thorough cleaning, pass water under high pressure through the pipe. The pressure will eliminate even the debris stuck on the sides of the pipe.
Conclusion
As stated herein, pipe liner installation needs to be done perfectly to serve you efficiently. This article has discussed tips on how you can ensure that the installation is a success. Consider such hacks, and you’ll have a pipeliner that’ll serve you for years to come.


